

Cox self-installation guide
COVID has made contactless installation the new norm now that ISPs (including Cox internet setup) are offering self-installation kits. The good news is, you don’t have to wait for a technician to come out if you know how to install your own Cox internet service
How to self-install your own Cox internet
Cox Communications is the third-largest internet provider in the country. If you’ve chosen the ISP as your service provider, follow these steps to successfully complete a Cox self-install.
Purchase Cox internet
Before getting started with a Cox self-install, you’ll need to choose an internet plan that works best for you. Depending on your area, Cox has up to five internet plans to choose from. They break down by internet speed:
- Internet Starter 25: Offers 25 Mbps download speeds, ideal for light internet use such as web surfing, social media and checking emails for up to three devices
- Internet Essential 50: Includes 50 Mbps download speeds ideal for light internet use for up to five devices
- Internet Preferred 150: Speeds of 150 Mbps for up to seven devices for heavier use such as some gaming, HD streaming and virtual learning/meetings
- Internet Ultimate 500: Upgrades download speeds to 500 Mbps to support 4K streaming and multiplayer gaming for up to nine devices
- Gigablast: Speeds of up to 940 Mbps for unlimited devices and activity including 8K streaming
You can order a plan over the phone, online or in-store. Once you purchase an internet plan, Cox will send equipment by next-day delivery for free.
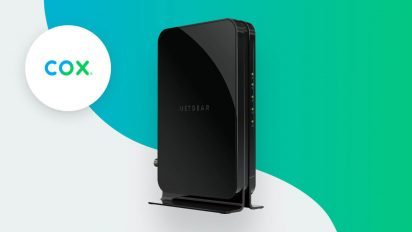
Setting up your Cox compatible modem
Find your Coax cable connection for modem setup
The coaxial cable connection delivers internet connectivity from the ISP to the interior of your home. It’s the connection point for a Cox modem setup. Look for a wall outlet with a small round connector at the height of an electrical outlet.
Most homes have a coax outlet. If you can’t find one, Cox customer service may be able to provide information on the location of the connector or tell you if a technician needs to come to install the connector first.
Cox modem setup or your own modem
To complete a Cox modem set up, you can use a compatible modem of your own or rent one from Cox. The ISP typically charges $12/mo. Follow these steps to install a modem regardless of whether it’s your own or Cox’s:
- Connect the coax cable that came in the Cox modem set-up box to the coax wall outlet and the back of the modem.
- Connect the power cord to the back of the device and plug it into an electrical outlet.
- Connect the ethernet cable to the back of the modem and to the device you want connectivity for, such as a computer.
- Power on the modem by pushing the power button, usually located at the back of the device. It should take about 15 minutes for the modem to initiate. You’ll notice the modem’s lights will be flashing at various intervals. It’s ready when the “online” light is solid.
Keep in mind that a modem is for a straight internet connection directly from the modem to a device. For home Wi-Fi, you’ll need a router. Your Cox modem is likely a two-in-one modem providing both hard-wired and wireless internet. However, if you’re installing your own modem, you may also need to add a wireless router.
Cox router setup and connection to modem
As mentioned, most Cox devices such as the Panoramic Wifi Gateway are two-in-one. A Cox router setup is similar to a modem setup.
- Connect the coax cable to the coax wall outlet and to the back of the router.
- Connect the power cord to the back of the device and plug it into an electrical outlet.
- For the strongest Wi-Fi signal, place your modem in an unobstructed spot at a height of at least three feet from the ground.
- Power the device by pushing the power button, usually located at the back. Allow for 15 minutes for Cox activate. The “online” light is solid when it’s ready.
- The Ethernet cable is optional in this method. You could use it to connect a device directly to the router for faster, more stable connectivity or skip it altogether.
Connect your devices to your wireless network
All that’s left to do is to connect your home devices to your new wireless network and perform a Cox activate. You’ll need to log in to your router.
- Open the Wi-Fi settings from a computer, smartphone or tablet.
- Connect to your network using the network name (SSID) and password located on a label at the bottom of the modem.
If you’d like to personalize your SSID or change the default router password, the easiest way to change it is through the Panoramic Wifi App. Or you could enter the router’s IP address into a browser’s address bar. The two most common addresses are 192.168.1.0 or 192.168.1.1, depending on the router you have. You could also find the IP address on a label at the bottom of your router.
Once you’re at the router’s login page, most routers use the word “admin” for the user and password. In other cases, the user may be “admin” and the password could be the word “password.” After you log in, look for a tab or section labels as “wifi” to change your router’s SSID and password.
Cox activate your internet connection
Once you complete the Cox router or modem setup, you should be able to go online. However, you will need to run a Cox activate process first to register the device. You can either activate your account online or by calling (800) 458-7154. For either method, be sure you have ready:
- Your phone number or account number
- Your Cox user ID and password to sign in
- Service address
- Your Cox PIN or the last four digits of the account owner’s Social Security number (SSN)
Activating takes just a few minutes. Once you’re ready to go, you should be able to surf the web, stream movies and connect all your devices to your home network.
Pro tip
While Cox has its own modems and routers available, renting one may not be as cost-effective as buying your own. There are wireless routers available that could have wider reach and faster speeds than what your ISP’s has to offer.
Before you go out and get your own, be mindful that the installation process may not be as seamless when you’re using an outside device. In addition, Cox may not be willing to help you troubleshoot the third-party router or provide service or support for it.
The bottom line
Cox self-install is designed to be a simple process. All you need to do is plug in your device following the simple steps provided and activate it when it’s ready. If you have any questions, need support, or in search of directions on how to return a rented modem, Cox customer service is available to help.
Allconnect: Let us compare providers for you
Why should you choose Allconnect? We’re the #1 broadband marketplace in the U.S, meaning you can trust us to search, compare and order internet and TV service for your home.
Get started
We value your feedback
Was this page helpful?
We value your feedback
We’re glad! Tell us what helped most on this page.
We value your feedback
Was this page helpful?
Thanks for your feedback!
Your insight helps, and we’ll do our best to improve your experience.

Written by:
Cynthia Paez Bowman
Cynthia Paez Bowman is a finance, real estate and international business journalist. Besides Bankrate.com, her work has been featured on Allconnect.com, Business Jet Traveler, MSN, CheatSheet.com, Freshome.com a…
Read more
![]()


Edited by:
Robin LaytonEditor, Broadband Content
-
Featured
![Best modems for Cox Communications]() Best modems for Cox Communications Allconnect — 5 min read
Best modems for Cox Communications Allconnect — 5 min read -
Featured
![How did your internet provider fare in the 2022 ACSI customer satisfaction study?]() How did your internet provider fare in the 2022 ACSI customer satisfaction study? Lisa Iscrupe — 3 min read
How did your internet provider fare in the 2022 ACSI customer satisfaction study? Lisa Iscrupe — 3 min read -
Featured
![Does your internet or TV provider owe you money for their service outages?]() Does your internet or TV provider owe you money for their service outages? Robin Layton — 5 min read
Does your internet or TV provider owe you money for their service outages? Robin Layton — 5 min read


Latest
-
Wednesday, December 11, 2024
All about Spectrum services: Your ultimate guideRobin Layton — 6 min read
-
Friday, December 6, 2024
AT&T launches new backup internet feature for AT&T Fiber customersCamryn Smith — 2 min read
-
Tuesday, November 26, 2024
What you need to stream TV: A beginner’s guideCamryn Smith — 9 min read
